

Table of Contents
How To Care For Your Orchid
Phalaenopsis Orchids are one of the most popular indoor house plants because of their long-lasting blossoms, low-maintenance care, and colorful flower displays. Phalaenopsis Orchids are a great indoor plant for both beginning plant parents and experienced plant lovers who want a low-maintenance flower to add to their collection. Caring for an orchid is relatively easy and the payoff is spectacular; presenting a flower for at least three and up to nine months, your orchid will decorate your home for much of the year! Raed on to find the specifics on indoor orchid care for beginners and beyond.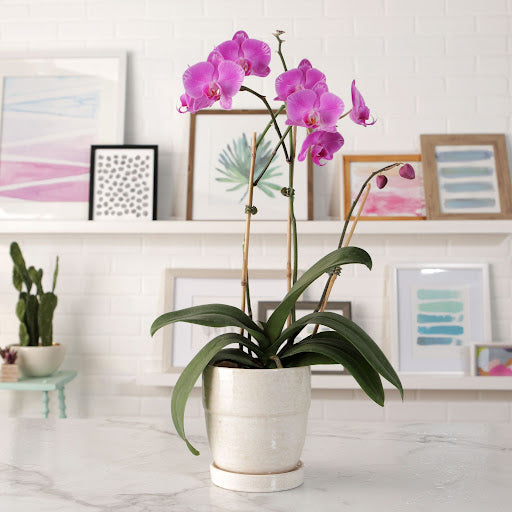
Photo Courtesy of Better Homes & Gardens
Light
Firstly, it’s important to understand how much light your orchid needs to make sure you are placing it in the best location in your home. Orchids need substantial light to thrive but should always be out of direct sunlight, as it can cause the leaves and flowers to burn. Phalaenopsis Orchids will do great in an east-facing window or under a grow light. We recommend using the Small 20W Aspect grow light and hanging it 24” to 36” inches above your plant for best results. This grow light is a great option to ensure your orchid is always receiving consistent light regardless of the weather and it allows you to place your orchid anywhere in the house, even in dark-lit, windowless rooms.Soil and Fertilizer
To ensure the Phalaenopsis Orchid's roots are getting everything needed to flourish, planting in the correct soil is essential. One unique aspect of potting your orchids is that in the wild, orchids require a host tree to grow. This means that not just any soil will give your orchid the support that it needs, but rather you need a soil that mimics a host tree and provides aeration for the roots. Depending on how much you want to DIY your growing process, you can buy a pre-made mix specifically for orchids or create your own. To make a mix from scratch, use ground bark chips from fir or redwood trees, and materials to aid water retention such as coconut husks and charcoal. A diluted fertilizer is best for feeding your orchid. You should fertilize “weakly weekly”, using a ¼ dilution of your fertilizer every week when watering as opposed to once per month. Regardless of what fertilizer you use, make sure to read the provided directions carefully because correct dilution is important – too much fertilizer can kill your orchid!Watering
Watering your orchid is a simple yet important aspect of your plant’s life because over-watering can prevent air circulation in the roots. A safe rule of thumb is to water your orchid once per week (unless your plant is flowering, then once every 2 weeks tends to work) and exclusively in the morning. Your Phalaenopsis Orchid must be planted in a pot with holes for aeration, so use this to your advantage when watering! An easy trick is to water your orchid while it sits in a drainage tray, such as a large bowl. Water generously and allow the roots to soak in the water collected by the tray for 15-20 minutes before removing the pot and allowing it to drain. There are some other watering methods you can try, such as running the roots under a sink faucet or placing ice cubes in the pot; find what works best for you! The most important rule, no matter how you choose to water your plant, is to never over-water! If you aren’t sure if your orchid is ready for its next watering, wait a day to be safe. Pay attention to what your plant is telling you through the moisture of the potting mix (dark, moist soil means there’s no need to add more water) and the appearance of the roots (green roots are a good sign!).Temperature and Humidity
Phalaenopsis Orchid's will thrive in average household temperatures (60°-78°F) and enjoy the typical changes of indoor temperatures between night and day. However, they do require slightly higher humidity than a typical household provides. A low-power humidifier and ceiling fan combination should provide enough humidity for your orchid to thrive. You can also use the pebble tray method to create a micro-environment and provide humidity for your plant.Planters
When choosing a pot for your orchid, make sure to look for ample drainage, air ventilation, and transparency. Because the roots require aeration, your pot must have proper drainage holes to prevent root rot and allow airflow. The ability to see the roots of your Phalaenopsis Orchid can make it easier to see how the plant is responding to its current conditions. To have both practicality and the aesthetics of an ornamental planter, purchase a pot that has a clear liner; plant your orchid in the clear, plastic insert and pop it into the outer planter, allowing for easy removal for check-ups. Here are a few pots we recommend! It’s a good idea to buy some clear, aerated inserts for your orchid if you want to switch your orchid from one pot to another, or in case your pot doesn’t include one with purchase. This set of 8 pots from Amazon come in four sizes so you can determine what fits your plant best!
  For a rustic-style planter, try this Octagon Cedar Basket. This planter can be hung or placed on your favorite plant stand. Slots in the wood are perfect for airflow and drainage, helping make sure your orchid can thrive.
  If you are looking for a more expensive and sturdy option, check out rePotme’s Pinwheel Ceramic Orchid Pot. It is designed with holes throughout the pot and a tray to sit in for ample aeration and drainage. For more resources: https://www.thespruce.com/phalaenopsis-orchids-definition-1902866 https://www.aos.org/orchids/additional-resources/phalaenopsis-are-easy-to-grow.aspx https://agrilife.org/urbantarranthorticulture/horticulture/resources/growing-phalaenopsis-orchids/


