Best Sellers


Explore Categories
-
NEW

Luna™ Wooden Pendant Wall Mount
Sculptural solid-wood wall mount with a graceful arch for pendant grow lights.
-
Save 10%

Grove™ Grow Light with Alta™ Vertical Stand Set
Grove bar light paired with the Hevea wood Alta stand for freestanding floor or shelf display.
-
Save 10%

Aspect™ Grow Light with Luna™ Wooden Wall Mount Set
Aspect pendant grow light paired with the sculptural Luna wooden wall mount for a ready-to-hang setup.
-
NEW STYLE

Versa™ Tabletop Grow Light
Adjustable, all-in-one tabletop grow light for desks, shelves, and plant corners.


Shop Categories
-
NEW
Luna™ Wooden Pendant Wall Mount
Sculptural solid-wood wall mount with a graceful arch for pendant grow lights.
-
Save 10%
Grove™ Grow Light with Alta™ Vertical Stand Set
Grove bar light paired with the Hevea wood Alta stand for freestanding floor or shelf display.
-
Save 10%
Aspect™ Grow Light with Luna™ Wooden Wall Mount Set
Aspect pendant grow light paired with the sculptural Luna wooden wall mount for a ready-to-hang setup.
-
NEW STYLE
Versa™ Tabletop Grow Light
Adjustable, all-in-one tabletop grow light for desks, shelves, and plant corners.
-
BEST SELLER

Aspect™ Gen 2 LED Growlight
Pendant-style grow light for medium to large plants that need overhead coverage.
-

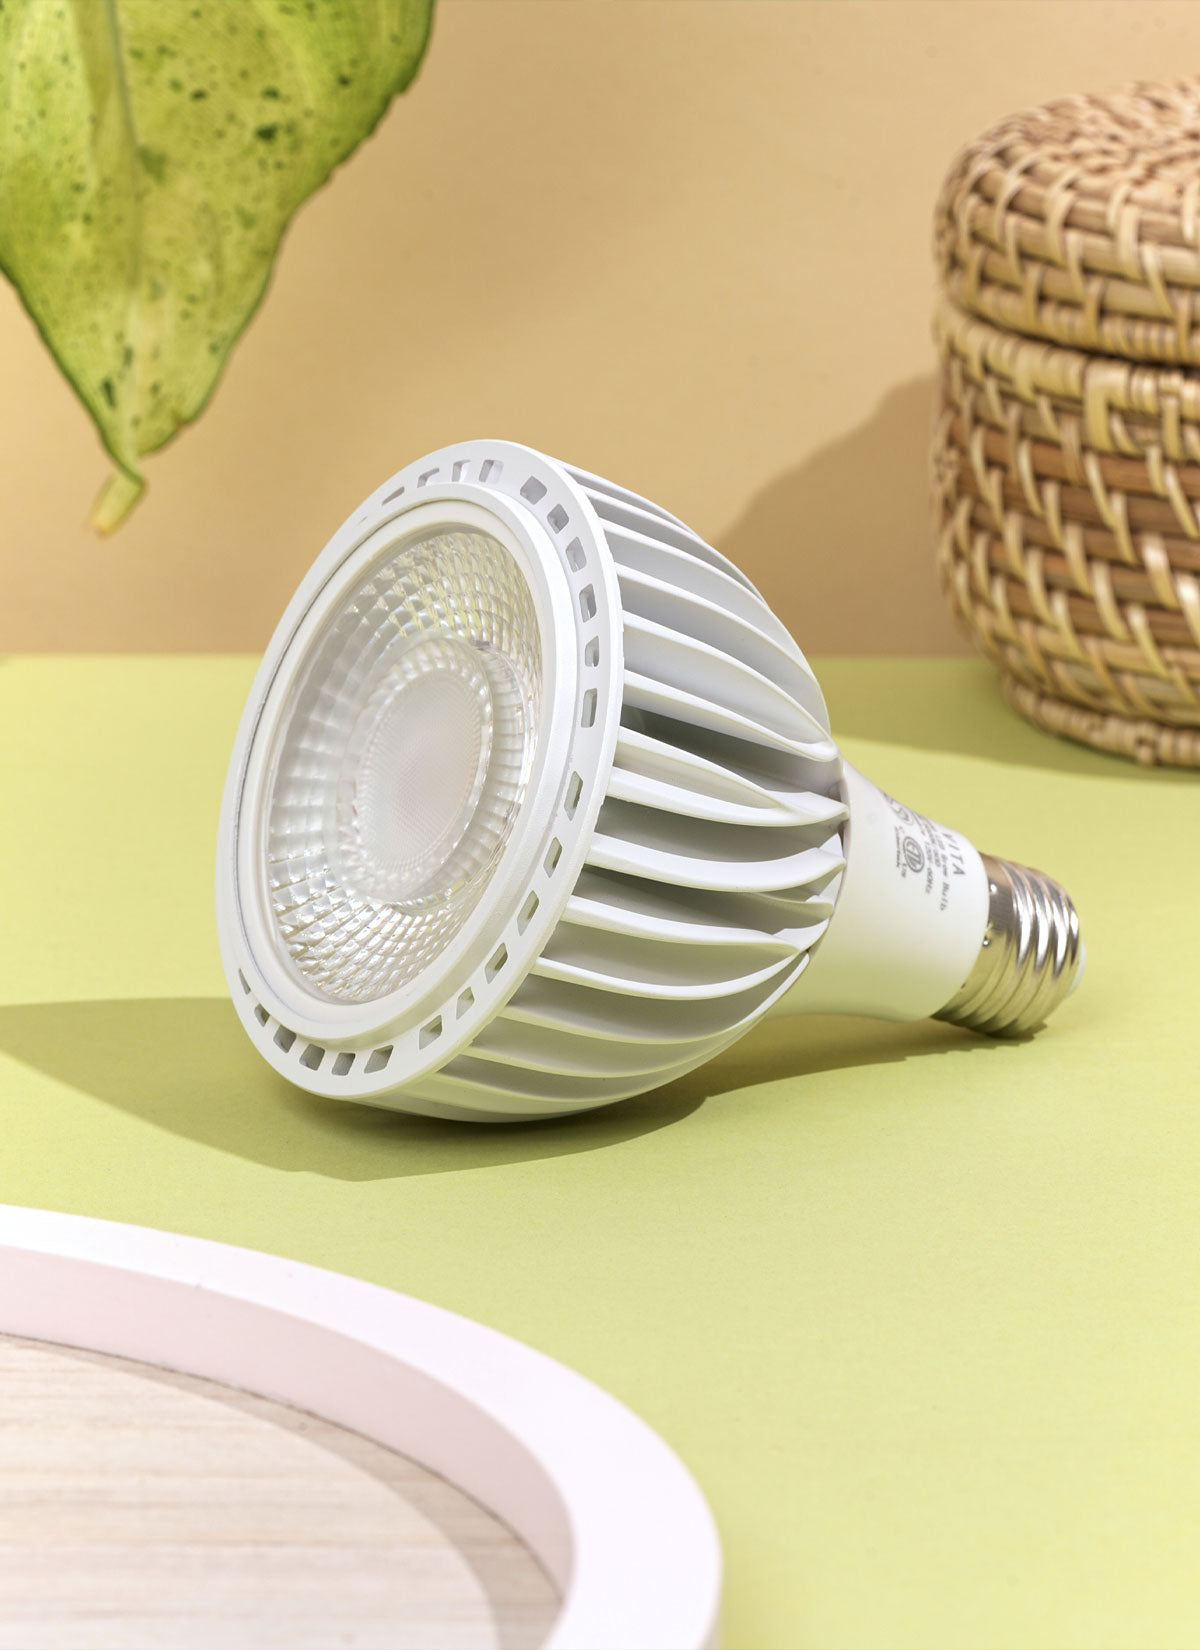
Vita™ Grow Light
Screw-in LED grow bulb for adding light to an existing lamp or fixture.
-
NEW STYLE
Versa™ Tabletop Grow Light
Adjustable, all-in-one tabletop grow light for desks, shelves, and plant corners.
-
Sold out

Aspect™ Grow Light with Stello™ Pendant Stand Set
Aspect pendant grow light paired with the freestanding, height-adjustable Stello stand.


-
Save 20%

Grove™ Triple Bundle + Connector Kit
Three Grove bar lights plus a connector kit for covering wider shelving or wall space.
-
Save 15%

Aspect™ Gen 2 Gift Set
Two Aspect pendant grow lights paired with Pinocchio wall mounts perfect for gifting.
-
Save 10%
Aspect™ Grow Light with Luna™ Wooden Wall Mount Set
Aspect pendant grow light paired with the sculptural Luna wooden wall mount for a ready-to-hang setup.
-
Sold out
Aspect™ Grow Light with Stello™ Pendant Stand Set
Aspect pendant grow light paired with the freestanding, height-adjustable Stello stand.


Shop Categories
-
Save 10%
Aspect™ Grow Light with Luna™ Wooden Wall Mount Set
Aspect pendant grow light paired with the sculptural Luna wooden wall mount for a ready-to-hang setup.
-
Save 15%
Aspect™ Gen 2 Gift Set
Two Aspect pendant grow lights paired with Pinocchio wall mounts perfect for gifting.
-
Sold out
Aspect™ Grow Light with Stello™ Pendant Stand Set
Aspect pendant grow light paired with the freestanding, height-adjustable Stello stand.
-
Save 10%

Rise & Shine Bundle
Aspect pendant grow light paired with the adjustable Pinocchio wall mount.

-
Save 15%

Grove™ Double Bundle
Two Grove bar lights bundled together for covering more shelf or wall space.
-
Save 20%
Grove™ Triple Bundle + Connector Kit
Three Grove bar lights plus a connector kit for covering wider shelving or wall space.
-
Save 10%
Grove™ Grow Light with Alta™ Vertical Stand Set
Grove bar light paired with the Hevea wood Alta stand for freestanding floor or shelf display.
-
Save 15%

Wildfern Aspect X Versa Bundle
Aspect pendant and Versa tabletop grow lights bundled together for shelves and plant corners.


-

Highland™ LED Track Light System
Complete plug-in track lighting system for growing multiple plants along a wall or ceiling.
-

Highland™ - Light Only
Track-mounted grow light for illuminating multiple plants along a wall or shelf.
-

Hardwired Highland™ Track Light System
Complete hardwired track lighting system for growing multiple plants along a wall or ceiling.


-
Save 10%

Vita Pendant Kit
Plug-and-play pendant fixture paired with the Vita grow bulb.
-
Save 10%

Vita™ Duo
Two Vita grow bulbs for adding light to fixtures you already own.
-
Save 15%

Greenfit™ Kit (Vita 4-Pack)
Four Vita grow bulbs bundled together for lighting multiple plants and places at once.
-

Willow™ Vita LED Grow Bulb Floor Lampstand
Marble-base 5.2ft floor lampstand for the Vita grow bulb, built for medium to large plants.


-
BEST SELLER
Aspect™ Gen 2 LED Growlight
Pendant-style grow light for medium to large plants that need overhead coverage.
-
Sold out
Aspect™ Grow Light with Stello™ Pendant Stand Set
Aspect pendant grow light paired with the freestanding, height-adjustable Stello stand.
-
Save 15%
Aspect™ Gen 2 Gift Set
Two Aspect pendant grow lights paired with Pinocchio wall mounts perfect for gifting.
-
Save 10%
Aspect™ Grow Light with Luna™ Wooden Wall Mount Set
Aspect pendant grow light paired with the sculptural Luna wooden wall mount for a ready-to-hang setup.
-
NEW STYLE
Versa™ Tabletop Grow Light
Adjustable, all-in-one tabletop grow light for desks, shelves, and plant corners.
-

Grove™ LED Grow Light
Under-cabinet or wall-mounted bar light for shelves, herbs, and smaller plant groupings.
-
Save 10%
Grove™ Grow Light with Alta™ Vertical Stand Set
Grove bar light paired with the Hevea wood Alta stand for freestanding floor or shelf display.
-
Save 15%
Grove™ Double Bundle
Two Grove bar lights bundled together for covering more shelf or wall space.

-
Vita™ Grow Light
Screw-in LED grow bulb for adding light to an existing lamp or fixture.
-
Save 10%
Vita Pendant Kit
Plug-and-play pendant fixture paired with the Vita grow bulb.
-
Willow™ Vita LED Grow Bulb Floor Lampstand
Marble-base 5.2ft floor lampstand for the Vita grow bulb, built for medium to large plants.
-
Save 10%
Vita™ Duo
Two Vita grow bulbs for adding light to fixtures you already own.
-
Highland™ LED Track Light System
Complete plug-in track lighting system for growing multiple plants along a wall or ceiling.
-
Highland™ - Light Only
Track-mounted grow light for illuminating multiple plants along a wall or shelf.
-
Hardwired Highland™ Track Light System
Complete hardwired track lighting system for growing multiple plants along a wall or ceiling.
-
Save 15%
Wildfern Aspect X Versa Bundle
Aspect pendant and Versa tabletop grow lights bundled together for shelves and plant corners.
-
BEST SELLER
Aspect™ Gen 2 LED Growlight
Pendant-style grow light for medium to large plants that need overhead coverage.
-
NEW STYLE
Versa™ Tabletop Grow Light
Adjustable, all-in-one tabletop grow light for desks, shelves, and plant corners.
-
Sold out

Wildfern Bundle
Versa tabletop and Aura ambient grow lights bundled for a plant corner with warm ambient glow.

-
Save 30%

Refurbished Aspect™ Gen 2 LED Growlight - Lightly Loved
Pendant-style grow light for medium to large plants that need overhead coverage.
-
Save 30%

Refurbished Grove™ LED Grow Light - Lightly Loved
Under-cabinet or wall-mounted bar light for shelves, herbs, and smaller plant groupings.
-
Sold out

Refurbished Vita™ LED Grow Light - Lightly Loved
Screw-in LED grow bulb for adding light to an existing lamp or fixture.
-
Sold out

Refurbished Aspect™ LED Growlight - Lightly Loved
Pendant-style grow light for medium to large plants that need overhead coverage.


-
NEW STYLE
Versa™ Tabletop Grow Light
Adjustable, all-in-one tabletop grow light for desks, shelves, and plant corners.
-
Save 10%
Grove™ Grow Light with Alta™ Vertical Stand Set
Grove bar light paired with the Hevea wood Alta stand for freestanding floor or shelf display.
-

Fern™ Vita LED Grow Bulb Adjustable Tabletop Lampstand
Marble-base tabletop lampstand for the Vita grow bulb and compatible lampshades.
-
Sold out

Aura™ Ambient Grow Light
Ambient grow lamp that doubles as a stylish accent light for any room.


-
Grove™ LED Grow Light
Under-cabinet or wall-mounted bar light for shelves, herbs, and smaller plant groupings.
-
Highland™ LED Track Light System
Complete plug-in track lighting system for growing multiple plants along a wall or ceiling.
-
Hardwired Highland™ Track Light System
Complete hardwired track lighting system for growing multiple plants along a wall or ceiling.
-
Highland™ - Light Only
Track-mounted grow light for illuminating multiple plants along a wall or shelf.
-
BEST SELLER
Aspect™ Gen 2 LED Growlight
Pendant-style grow light for medium to large plants that need overhead coverage.
-
Highland™ LED Track Light System
Complete plug-in track lighting system for growing multiple plants along a wall or ceiling.
-
Sold out
Aspect™ Grow Light with Stello™ Pendant Stand Set
Aspect pendant grow light paired with the freestanding, height-adjustable Stello stand.
-
NEW STYLE
Versa™ Tabletop Grow Light
Adjustable, all-in-one tabletop grow light for desks, shelves, and plant corners.
-
NEW STYLE
Versa™ Tabletop Grow Light
Adjustable, all-in-one tabletop grow light for desks, shelves, and plant corners.
-
Save 10%
Grove™ Grow Light with Alta™ Vertical Stand Set
Grove bar light paired with the Hevea wood Alta stand for freestanding floor or shelf display.
-
Vita™ Grow Light
Screw-in LED grow bulb for adding light to an existing lamp or fixture.
-
Fern™ Vita LED Grow Bulb Adjustable Tabletop Lampstand
Marble-base tabletop lampstand for the Vita grow bulb and compatible lampshades.
-
Vita™ Grow Light
Screw-in LED grow bulb for adding light to an existing lamp or fixture.
-
NEW STYLE
Versa™ Tabletop Grow Light
Adjustable, all-in-one tabletop grow light for desks, shelves, and plant corners.
-
Grove™ LED Grow Light
Under-cabinet or wall-mounted bar light for shelves, herbs, and smaller plant groupings.
-
Sold out
Aspect™ Grow Light with Stello™ Pendant Stand Set
Aspect pendant grow light paired with the freestanding, height-adjustable Stello stand.
-

Is Rare Houseplant Collecting Back? What the Research Says
-

2 Colorful Houseplants Worth Adding to Your Collection (And the One Light That Covers Both)
-

3 Ways to Bring Warm Wood Tones Into Your Plant Setup This Fall
-

Can Fallen Leaves Feed Your Houseplants? What Leaf Mold Actually Does
-

How to Propagate a Pink Princess Philodendron: A Step-by-Step Guide
-

Why Is My Plant's Growth Slow or Leggy? 7 Common Causes and Fixes
-

Why Aren't My Monstera's Leaves Splitting? 6 Common Causes and How to Fix Them
-

What Are the Best Plants for a Staircase Garden?


-
NEW
Luna™ Wooden Pendant Wall Mount
Sculptural solid-wood wall mount with a graceful arch for pendant grow lights.
-
NEW

Alta™ - Vertical Stand for Grove™
Refined vertical stand made from Hevea wood for the Grove grow light.
-
NEW

Kasa Smart Wi-Fi Plug Mini
Bring your Soltech grow lights into your smart home ecosystem with the Kasa Smart Wi-Fi Plug Mini. Designe...
-
Sold out

Stello™ Adjustable Pendant Stand
Renter-friendly steel and aluminum stand for Aspect or Vita pendant lights.


Shop Categories
-
NEW
Luna™ Wooden Pendant Wall Mount
Sculptural solid-wood wall mount with a graceful arch for pendant grow lights.
-
NEW

Angle Kit | Adjustable Hanger for the Aspect™ Grow Light
Precision-crimped metal hanger that tilts and directs the Aspect grow light.
-
Sold out
Stello™ Adjustable Pendant Stand
Renter-friendly steel and aluminum stand for Aspect or Vita pendant lights.
-

Pinocchio - Adjustable Wall Mount
Adjustable beechwood wall mount, paintable to match any room.


-
NEW
Alta™ - Vertical Stand for Grove™
Refined vertical stand made from Hevea wood for the Grove grow light.
-

Connector Kit | Grove™ LED Bar Light | Up to 4 Lights
Connector kit for powering and arranging up to four Grove bar lights.
-

Grove™ Extension Cord | 3ft
3ft extension cord for cleaner cable routing with the Grove bar light.
-

Wall Fairlead 2-Pack
Universal fairlead for securing your grow light cord to a wall or ceiling.


-
Save 10%

Vita Accessory Kit - Build Your Own
Customizable accessory kit for tailoring your Vita grow light setup.
-

Modern Pendant and Socket
Fabric-corded pendant and socket for suspending the Vita grow bulb.
-

Verona - Woven Rope Lampshade
Woven rope lampshade for a natural, textured upgrade to the Vita grow light.
-
Willow™ Vita LED Grow Bulb Floor Lampstand
Marble-base 5.2ft floor lampstand for the Vita grow bulb, built for medium to large plants.


-

4ft Highland™ Track Rail
4ft Halo-compatible track rail for the Highland track system.
-

Highland™ Power Source
Hardwired or plug-in power source for the Highland track rail.
-

Straight Connector for Highland™ Track Rail (H-Type)
Connector for a seamless, continuous run of Highland track rail.
-

Flex Connector for Highland™ Track Rail (H-Type)
Adjustable 0°-90° joint for routing Highland track rail around corners or angles.


-
BEST SELLER
Aspect™ Gen 2 LED Growlight
Pendant-style grow light for medium to large plants that need overhead coverage.
-
Sold out
Aspect™ Grow Light with Stello™ Pendant Stand Set
Aspect pendant grow light paired with the freestanding, height-adjustable Stello stand.
-
Save 15%
Aspect™ Gen 2 Gift Set
Two Aspect pendant grow lights paired with Pinocchio wall mounts perfect for gifting.
-
Save 10%
Aspect™ Grow Light with Luna™ Wooden Wall Mount Set
Aspect pendant grow light paired with the sculptural Luna wooden wall mount for a ready-to-hang setup.
-
NEW STYLE
Versa™ Tabletop Grow Light
Adjustable, all-in-one tabletop grow light for desks, shelves, and plant corners.
-
Grove™ LED Grow Light
Under-cabinet or wall-mounted bar light for shelves, herbs, and smaller plant groupings.
-
Save 10%
Grove™ Grow Light with Alta™ Vertical Stand Set
Grove bar light paired with the Hevea wood Alta stand for freestanding floor or shelf display.
-
Save 15%
Grove™ Double Bundle
Two Grove bar lights bundled together for covering more shelf or wall space.
-
Vita™ Grow Light
Screw-in LED grow bulb for adding light to an existing lamp or fixture.
-
Save 10%
Vita Pendant Kit
Plug-and-play pendant fixture paired with the Vita grow bulb.
-
Willow™ Vita LED Grow Bulb Floor Lampstand
Marble-base 5.2ft floor lampstand for the Vita grow bulb, built for medium to large plants.
-
Save 10%
Vita™ Duo
Two Vita grow bulbs for adding light to fixtures you already own.
-
Highland™ LED Track Light System
Complete plug-in track lighting system for growing multiple plants along a wall or ceiling.
-
Highland™ - Light Only
Track-mounted grow light for illuminating multiple plants along a wall or shelf.
-
Hardwired Highland™ Track Light System
Complete hardwired track lighting system for growing multiple plants along a wall or ceiling.
-
Save 30%
Refurbished Aspect™ Gen 2 LED Growlight - Lightly Loved
Pendant-style grow light for medium to large plants that need overhead coverage.
-
Save 30%
Refurbished Grove™ LED Grow Light - Lightly Loved
Under-cabinet or wall-mounted bar light for shelves, herbs, and smaller plant groupings.
-
Sold out
Refurbished Vita™ LED Grow Light - Lightly Loved
Screw-in LED grow bulb for adding light to an existing lamp or fixture.
-
Sold out
Refurbished Aspect™ LED Growlight - Lightly Loved
Pendant-style grow light for medium to large plants that need overhead coverage.
-
NEW STYLE
Versa™ Tabletop Grow Light
Adjustable, all-in-one tabletop grow light for desks, shelves, and plant corners.
-
Save 10%
Grove™ Grow Light with Alta™ Vertical Stand Set
Grove bar light paired with the Hevea wood Alta stand for freestanding floor or shelf display.
-
Fern™ Vita LED Grow Bulb Adjustable Tabletop Lampstand
Marble-base tabletop lampstand for the Vita grow bulb and compatible lampshades.
-
Sold out
Aura™ Ambient Grow Light
Ambient grow lamp that doubles as a stylish accent light for any room.
-
Grove™ LED Grow Light
Under-cabinet or wall-mounted bar light for shelves, herbs, and smaller plant groupings.
-
Highland™ LED Track Light System
Complete plug-in track lighting system for growing multiple plants along a wall or ceiling.
-
Hardwired Highland™ Track Light System
Complete hardwired track lighting system for growing multiple plants along a wall or ceiling.
-
Highland™ - Light Only
Track-mounted grow light for illuminating multiple plants along a wall or shelf.
-
BEST SELLER
Aspect™ Gen 2 LED Growlight
Pendant-style grow light for medium to large plants that need overhead coverage.
-
Highland™ LED Track Light System
Complete plug-in track lighting system for growing multiple plants along a wall or ceiling.
-
Sold out
Aspect™ Grow Light with Stello™ Pendant Stand Set
Aspect pendant grow light paired with the freestanding, height-adjustable Stello stand.
-
NEW STYLE
Versa™ Tabletop Grow Light
Adjustable, all-in-one tabletop grow light for desks, shelves, and plant corners.
-
NEW STYLE
Versa™ Tabletop Grow Light
Adjustable, all-in-one tabletop grow light for desks, shelves, and plant corners.
-
Save 10%
Grove™ Grow Light with Alta™ Vertical Stand Set
Grove bar light paired with the Hevea wood Alta stand for freestanding floor or shelf display.
-
Vita™ Grow Light
Screw-in LED grow bulb for adding light to an existing lamp or fixture.
-
Fern™ Vita LED Grow Bulb Adjustable Tabletop Lampstand
Marble-base tabletop lampstand for the Vita grow bulb and compatible lampshades.
-
Vita™ Grow Light
Screw-in LED grow bulb for adding light to an existing lamp or fixture.
-
NEW STYLE
Versa™ Tabletop Grow Light
Adjustable, all-in-one tabletop grow light for desks, shelves, and plant corners.
-
Grove™ LED Grow Light
Under-cabinet or wall-mounted bar light for shelves, herbs, and smaller plant groupings.
-
Sold out
Aspect™ Grow Light with Stello™ Pendant Stand Set
Aspect pendant grow light paired with the freestanding, height-adjustable Stello stand.
-
Is Rare Houseplant Collecting Back? What the Research Says
-
2 Colorful Houseplants Worth Adding to Your Collection (And the One Light That Covers Both)
-
3 Ways to Bring Warm Wood Tones Into Your Plant Setup This Fall
-
Can Fallen Leaves Feed Your Houseplants? What Leaf Mold Actually Does
-
How to Propagate a Pink Princess Philodendron: A Step-by-Step Guide
-
Why Is My Plant's Growth Slow or Leggy? 7 Common Causes and Fixes
-
Why Aren't My Monstera's Leaves Splitting? 6 Common Causes and How to Fix Them
-
What Are the Best Plants for a Staircase Garden?